Face Detection Kiosk
Face Detection Kiosk
In this post we’ll show you how we built a facial detection kiosk that’s based on Ubuntu Core and Tensorflow.
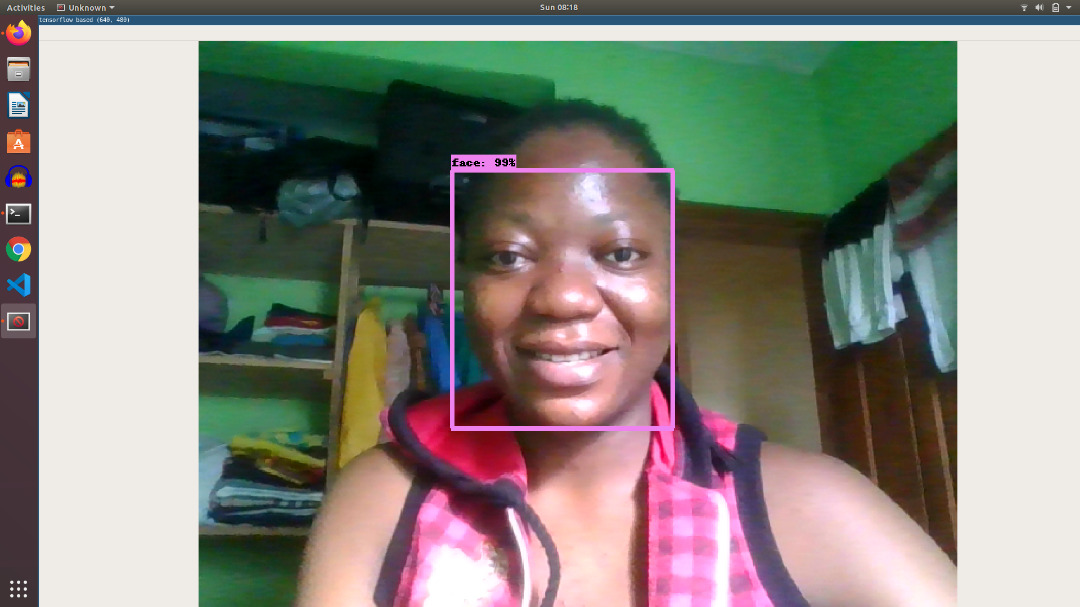
In other words, we’ll show you how we built a smart camera and screen that can detect faces in realtime and outline the faces on screen.
In past posts, we’ve shown you how to install Ubuntu Core on both Raspberry Pi and the Intel Nuc. We’ve also showed how to created a video kiosk using existing snaps. In this post we’ll dive a bit deeper into how you can build your own applications on Ubuntu Core using snaps.
Our goal here is to give you an idea of what the process looks like to develop an application for Ubuntu Core. A lot of the ideas in terms of process came from this talk by Galem Kayo. The basic premise is to start by making your application work on Ubuntu Server, then migrate to Ubuntu Core by snapping your application. We followed a similar process but since we were planning to build a kiosk, we started building our app on Ubuntu Desktop.
Building for Ubuntu Desktop First
We started with a fairly straightforward python script that used Tensorflow to do facial detection: https://github.com/yeephycho/tensorflow-face-detection. The script processes a video in realtime and draws a box around any part of the image it believes contains a face. It can work with pre-recorded videos or with live video from a webcam.
With a little coaxing, we were able to get the script working on our Ubuntu 20.04 laptop. The script had a number of variables hardcoded so we forked the repo, and made some upgrades to the script.

Packing the Script as a Snap
The process of snapping the script was very straightforward. It was mostly a matter of finding the required python modules, and deb packages to include. We also needed to declare that the snap would plug the camera interface. (You can check the repo to see how to build the snap yourself if you’re following along.)
Switching to Wayland instead of X
At this point our snap was working but it was using X11 for its display. X is not supported on Ubuntu Core because of security issues around confinement. We needed to switch the snap from using X to using Wayland. To do this we embedded XWayland into the snap. You can think of it like a converter between an X client and a Wayland display server. You can find a great tutorial that goes into greater detail here: https://ubuntu.com/tutorials/x11-kiosk#1-overview. To test our snap we logged out of our X session (the default) on our Ubuntu laptop and logged back in with a Wayland session. All was working and we ready to test on an Ubuntu Core device.
Building for the Target Device
Our first target device was a Raspberry Pi, which is ARM based (unlike our laptop). We quickly ran into trouble. Ubuntu does a phenomenal job at standardizing their packages across various architectures, so generally if your app works on AMD64, it will work without too much effort on an ARM device. Unfortunately this was not the case for us. Our first obstacle was the opencv-python package which is not available on arm64. But no worry! We switched to our Intel Nuc which is of course an x86_64 architecture, which allowed us to build the snap for our target without a problem. (Stay tuned we’re still working on building it for Raspberry Pi.)
Since we switched back to targeting AMD64, we already had a snap for the architecture (the one we build for our laptop), and so we were ready to install and test it.
Tensorflow and AVX
After installing the snap on our NUC we realized we had another problem. Our NUC had an older CPU that did not support the AVX instruction set. And unfortunately, the prebuilt version of Tensorflow required AVX support. Fortunately we were able to build Tensorflow from source and disable the AVX extension. While this did work, there are significant drawbacks to disabling AVX, chief of which is SPEED.
Installing and Running
If you would like to try it yourself, you will need to build the snap yourself, because we did not add this one to the app store. We used snapcraft’s remote-build feature, because building Tensorflow does take a significant about of time and memory.
# Build the snap
git clone https://github.com/farstack/face-detection-snap.git
cd face-detection-snap
snapcraft remote-build

# Install the Snap
scp ./face-detection-0.1-amd64.snap _username_@_ip-address_/home/_username_/
ssh _username@_ip-address_
sudo snap install mir-kiosk
sudo snap install --dangerous ./face-detection-0.1-amd64.snap
sudo snap connect face-detection:camera
sudo snap restart face-detection
Latest Posts
Building an Appliance Images
12 Dec 2020
A First Look at Ubuntu Appliance Portfolio
18 Oct 2020